If you polled 100 people, you’d be hard-pressed to find someone who didn’t know fire making is key to survival. You’d also be hard-pressed to find someone who knew how to do it without matches or a lighter.
There are so many ways to make fire that it can be hard for a beginner to know where to start. We’ve gathered some common methods and assessed their pros and cons so you can pick a technique to add to your survival skills portfolio.
Now at your next cookout, you can annoy everyone by taking two hours to get the grill lit … without a match!
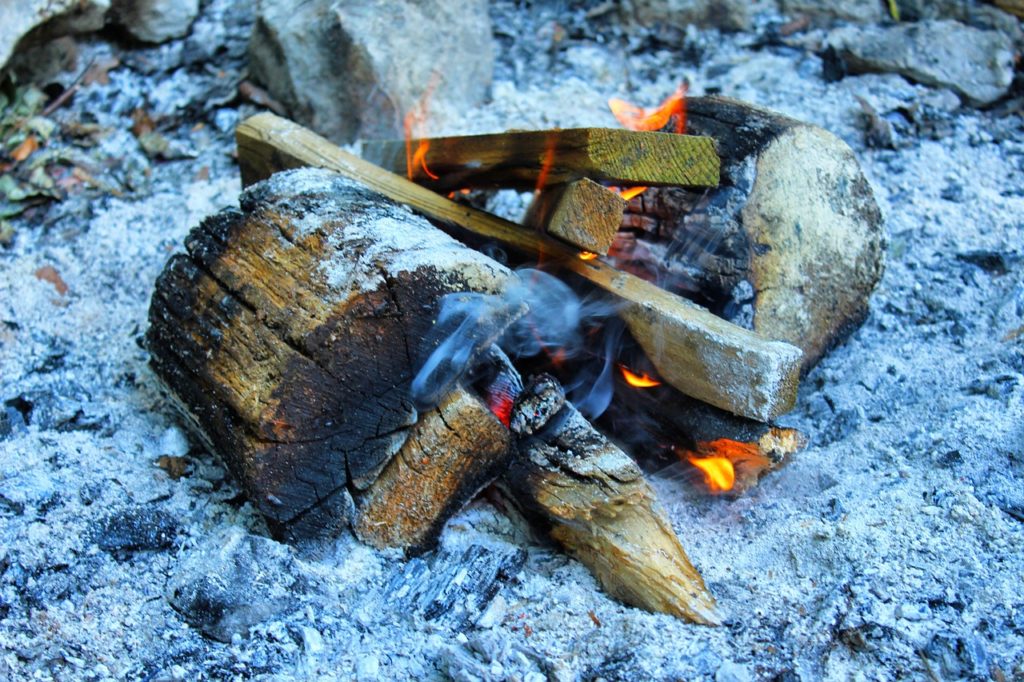
Friction Methods
If you’re stuck with little to no supplies, friction methods will be key to your survival. No flint, no glass, no magnesium – no problem.
No matter which of these techniques you use, you’ll have to know one basic survival skill – how to properly notch a board and set a spindle in it. Modify from there to fit your chosen technique.
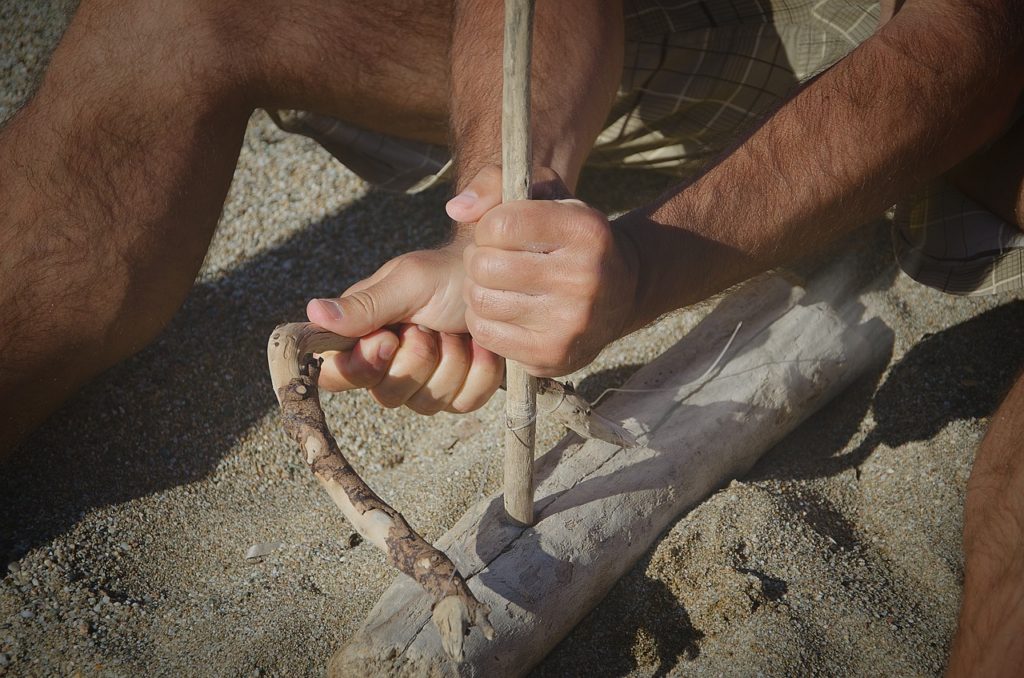
Bow Drill
The bow drill is a common introductory technique for one person who’s stuck with few supplies. By winding the string of a small bow around your spindle, you can turn the spindle with much less effort and keep continuous motion on your fire board. Incidentally, we mean a bow you’ve made from a stick and a string, not the decoration from your child’s pigtail. If you’ve gotten your kid lost in the wilderness with you, you’ll need a whole new set of survival skills in your upcoming divorce settlement.
- Pros: The bow drill is relatively easy to make and to use, and can be manned by one person.
- Cons: You’re making fire with a stick and a bow. You tell me what the cons are.
Pump Fire Drill
A pump fire drill is significantly more complex. It uses a string, a weighted shaft, and a crossbar to create friction. You can create a coal by pumping the crossbar up and down. See directions on construction here.
- Pros: The pump drill works quickly with little exertion of effort. It’s far less tiring than any other friction method, because you’re multiplying your efforts with the use of a simple machine.
- Cons: Where are you planning on getting that pump drill? Constructing one in the wild takes a while and requires some serious bushcraft and survival skills. You’ll need another method in the meantime, unless your plan is to toughen up the first few weeks with some parasitic infections and hypothermia.
Two-Man Friction Drill
If you have someone with you, you can double down on the basic “spin a stick” technique by having one person bear down on the spindle, and the other pull a string that’s wound around the spindle.
- Pros: By breaking the task into two parts, you can more easily maintain speed and pressure. It’s also simple to construct.
- Cons: You’ll need two people. Depending on your personality, that may or may not be hard to come by.
Classic Fire Starters
Friction techniques are harder than they look. These techniques are classic for a reason.
Flint & Steel
Flint and steel are the ultimate old school fire starters. By striking steel against a piece of flint rock, you can light your tinder without a coal.
- Pros: Flint and steel hastens the rate of starting a fire. Also, flint rock occurs naturally, so you’ve got a chance at using this technique with few supplies.
- Cons: Properly using flint and steel is a survival skill in its own right and takes a bit of practice. The sparks it produces won’t light found tinder directly unless it’s incredibly dry, so you’ll also need char cloth to get started.
Magnesium Fire Starter/Ferro Rod
A ferro rod is basically manmade flint, and functions similarly. Magnesium fire starters embed the ferro rod in a piece of magnesium, which can be shaved into a pile and put over your tinder for even quicker catching.
- Pros: A ferro rod produces hotter sparks and will get a fire going more readily. It’s also easier to make a spark than with the rock you just picked up from the dirt and think is probably flint.
- Cons: You have to buy it and pack it in. Ferro rod doesn’t occur naturally, so if you lose yours and you haven’t learned another technique, you’re chances at survival are kind of … well, it rhymes with ducked.
Electrical and Solar Techniques
Even if you’ve mastered flint and steel or the bow drill, there’s always value in saving some energy by thinking outside the box.
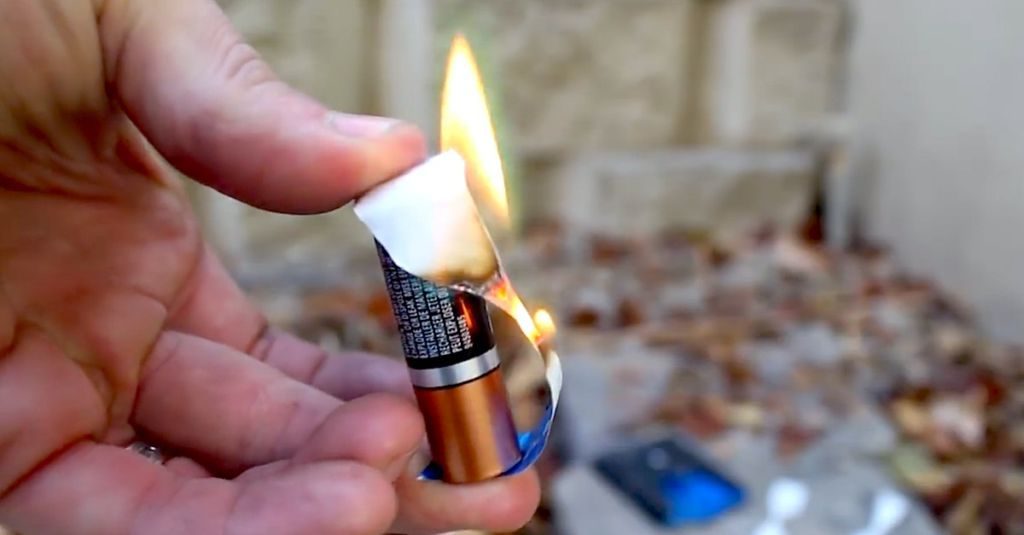
Use a Battery
By taking the battery out of your cell phone and rubbing the contact points against some steel wool, you can short the battery. You’ll create a fire that will start in seconds and burn out just as quickly.
You can also use an alkaline battery and an aluminum-lined gum wrapper. By putting a strip of aluminum on each end of the battery and connecting them in the middle, you’ll create flame.
- Pros: Both of these techniques work quickly once you get them right. They also don’t require physical exertion.
- Cons: These techniques require a set of supplies that burn up with every attempt at lighting your tinder. Once your gum wrappers and steel wool are gone, you’ll need another plan.
Harness the Sun
Hold stuff under the sun. Preferably shiny stuff.
Fine, we’ll be more specific. Eyeglasses, bottles, or even a bag of water in a spherical shape can focus sunlight into a ray strong enough to ignite tinder. The bottom of a soda can works, too, when polished.
- Pros: If you get your angles just right, you can make fire even when weak.
- Cons: Solar techniques can be hit or miss – the soda can is especially difficult and only for an emergency situation. They also rely on a clear, sunny day, which isn’t something everyone can count on.
Keep in mind that no method in this list will work in all conditions. To really count fire making as one of your survival skills, you should know an arsenal of techniques, so that when push comes to shove, you won’t be left in the cold.